
I've been feeling better (my flu has a great work ethos and only grabs me on weekends and holidays) and I have been traveling for work quite a lot. It's been busy but good. There are a lot of moments in my life right now where I take a big breath in and feel insanely happy and blessed to be where I am at. My life is made out of pretty amazing stuff and I'm enjoying every bit of it.
It's been full on fall here in Holland this week and fall means flu and phlegm. I know, I know. You live for these kinds of blog posts. Fortunately, over-sharing is my middle name. Also, that's how Mr. Floor got the flu. We're like communists, sharing everything even if it makes no sense and it takes away your will to live.
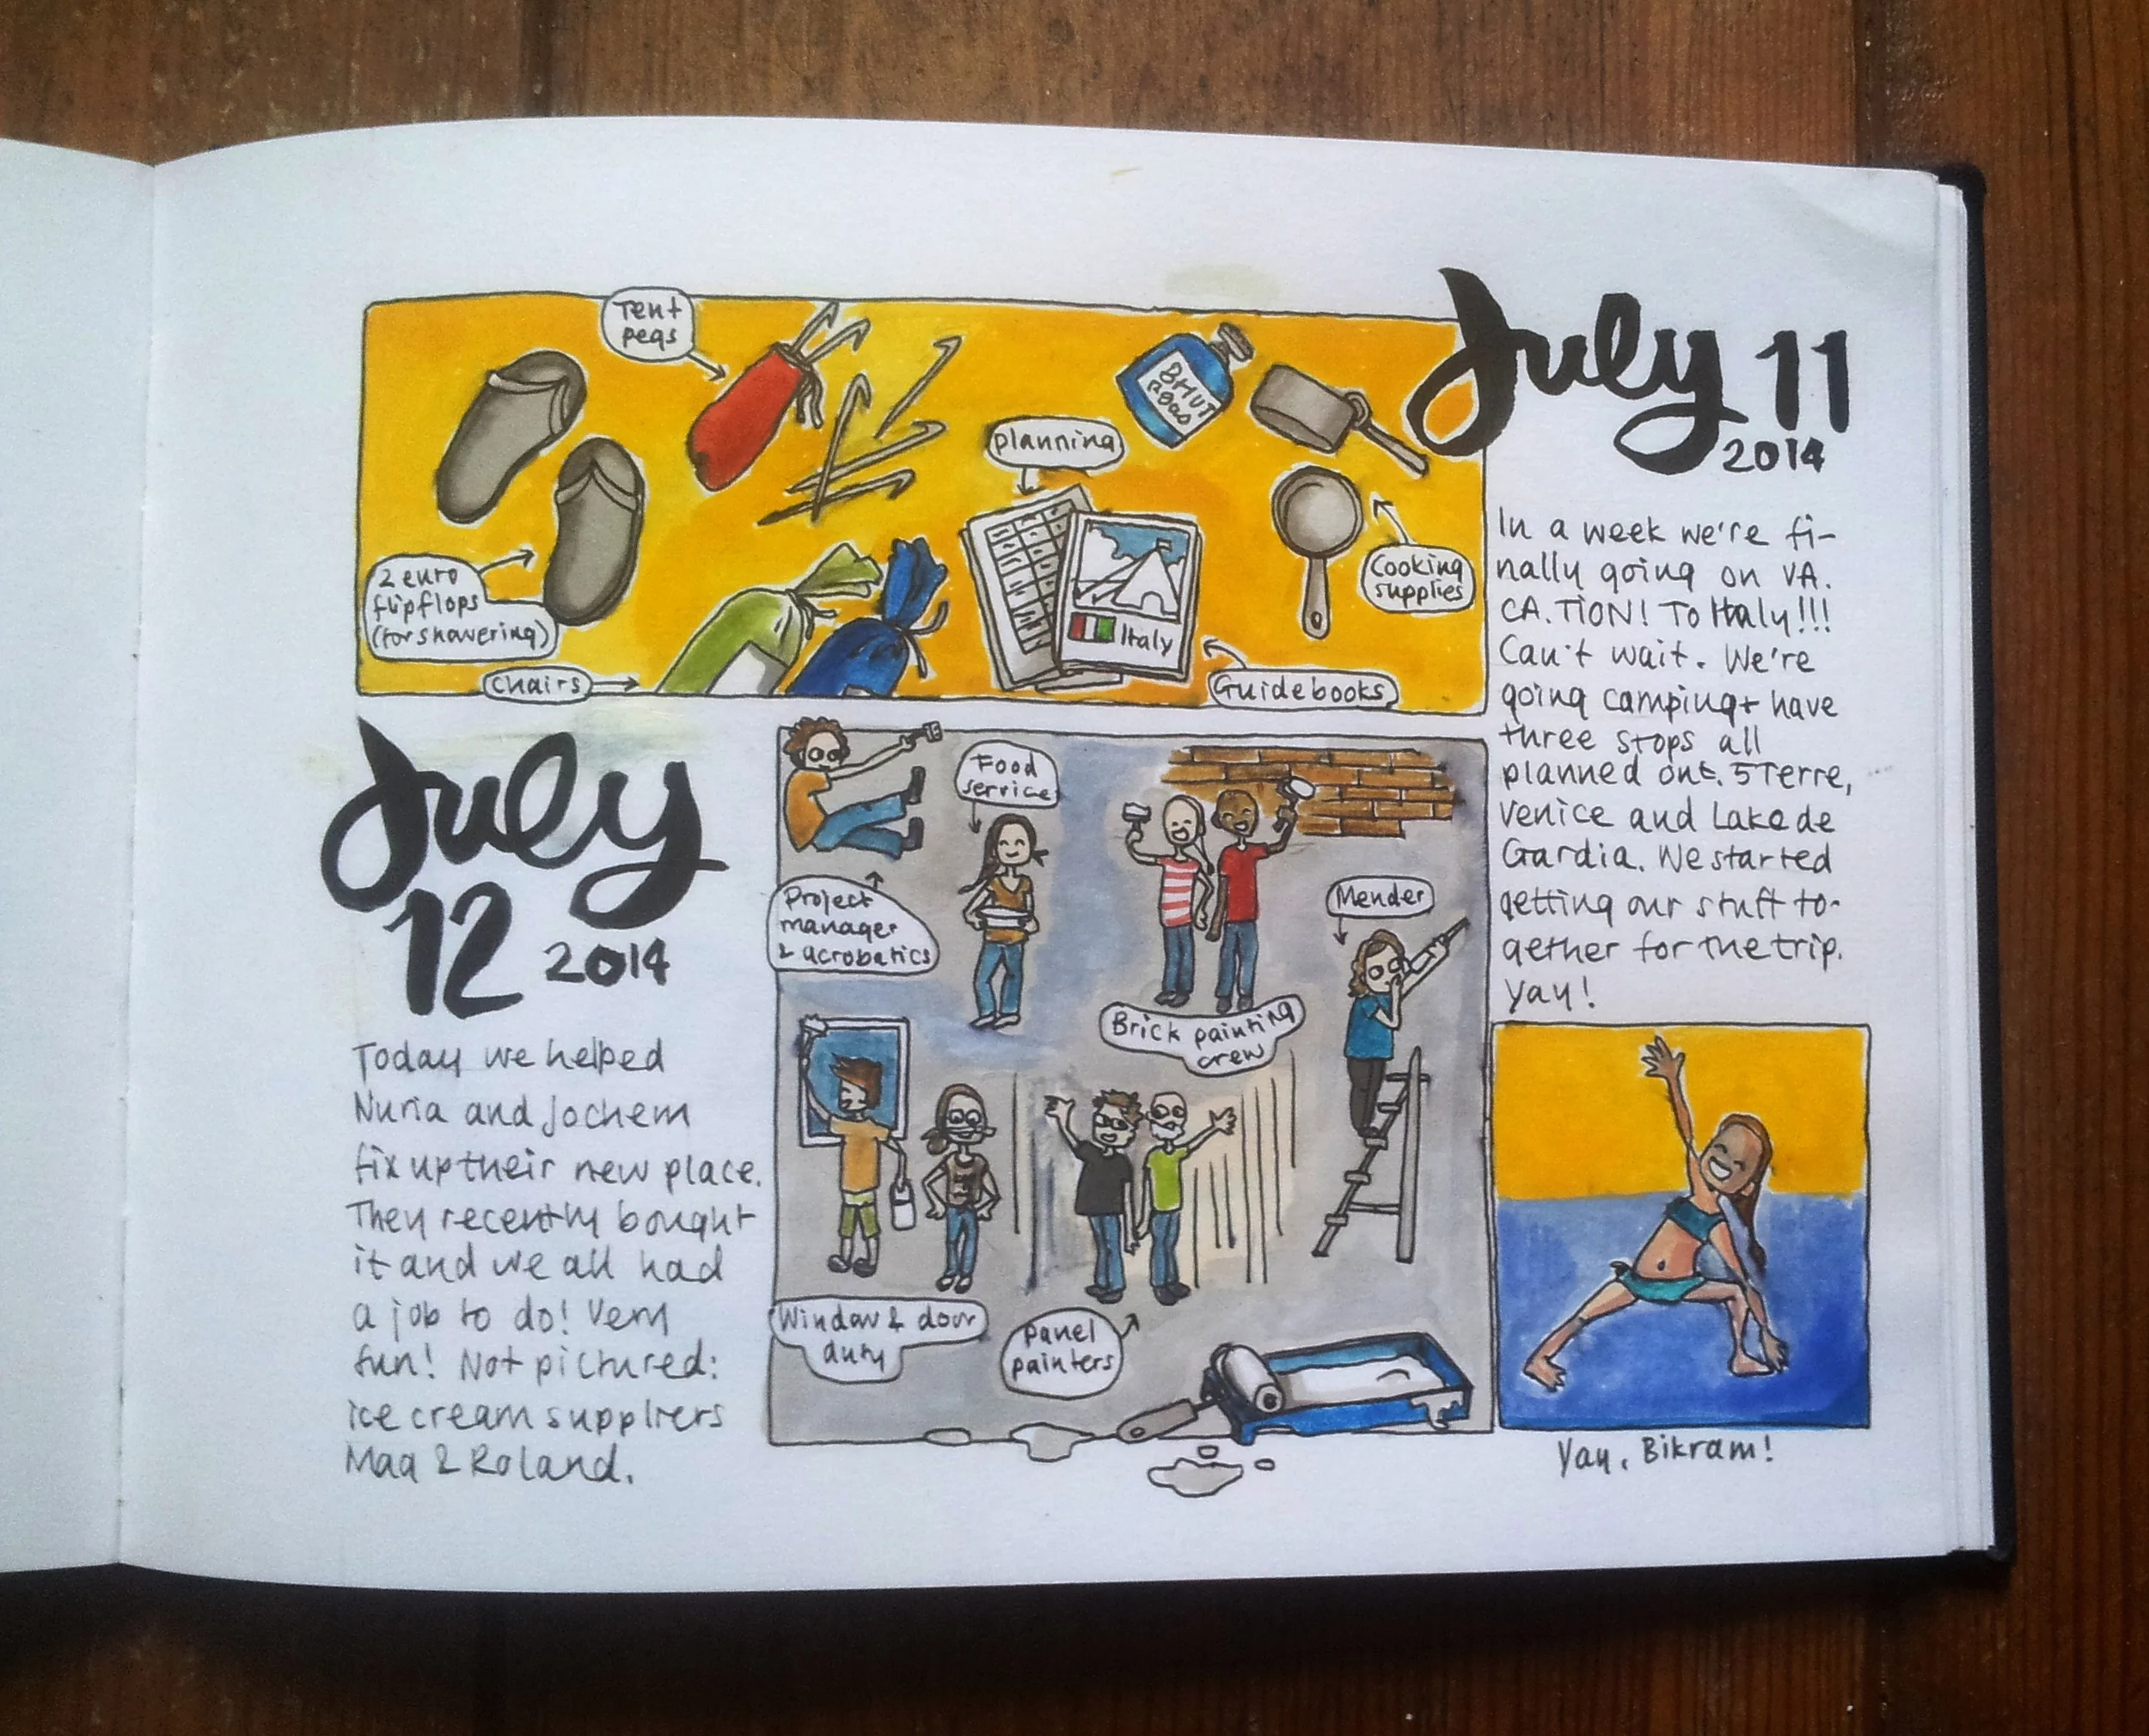
In any case, these were again done in watercolors and Copic markers and I had real trouble getting the colors just right, but I just couldn't be bothered.
Keeping an illustrated travel journal of your journey can be incredibly rewarding and romantic. It is an amazing souvenir and the process of creating will help you be more attentive to the little things and big sights you'll see on your trip. You'll remember and appreciate everything around you that much more.
It can also be hard and annoying. Why would you spend all this time drawing and sitting around when there's so much to do and see? Why carry around a notebook and paints and pens, when you can just bring your phone and take a quick snapshot?
Good point and this is why I believe in having a good travel-ready journal kit with you wherever you go.
My Travel Journal Kit
- a set of Caran d'Ache gouaches
- a small box of Winsor & Newton watercolors with a small brush
- my journal (I currently use an A5 cloth-bound hardcover journal from Seawhite of Brighton)
- some watercolor postcards (most brilliant invention ever) from CASS art
- a few Bic mechanical pencils (those cheap, plastic ones)
- Micron pens (I prefer the 0.5 width)
- a tiny plastic bottle of water (33 cl). We got this one from an airline, I drank the fancy water and refilled it.
The kit fitted comfortably in my small backpack and weighed next to nothing.
Top Travel Journal Tips
- Draw a little every day - and don't forget to bring your kit! It'll help you to quickly get into a habit of observing the world around you more closely.
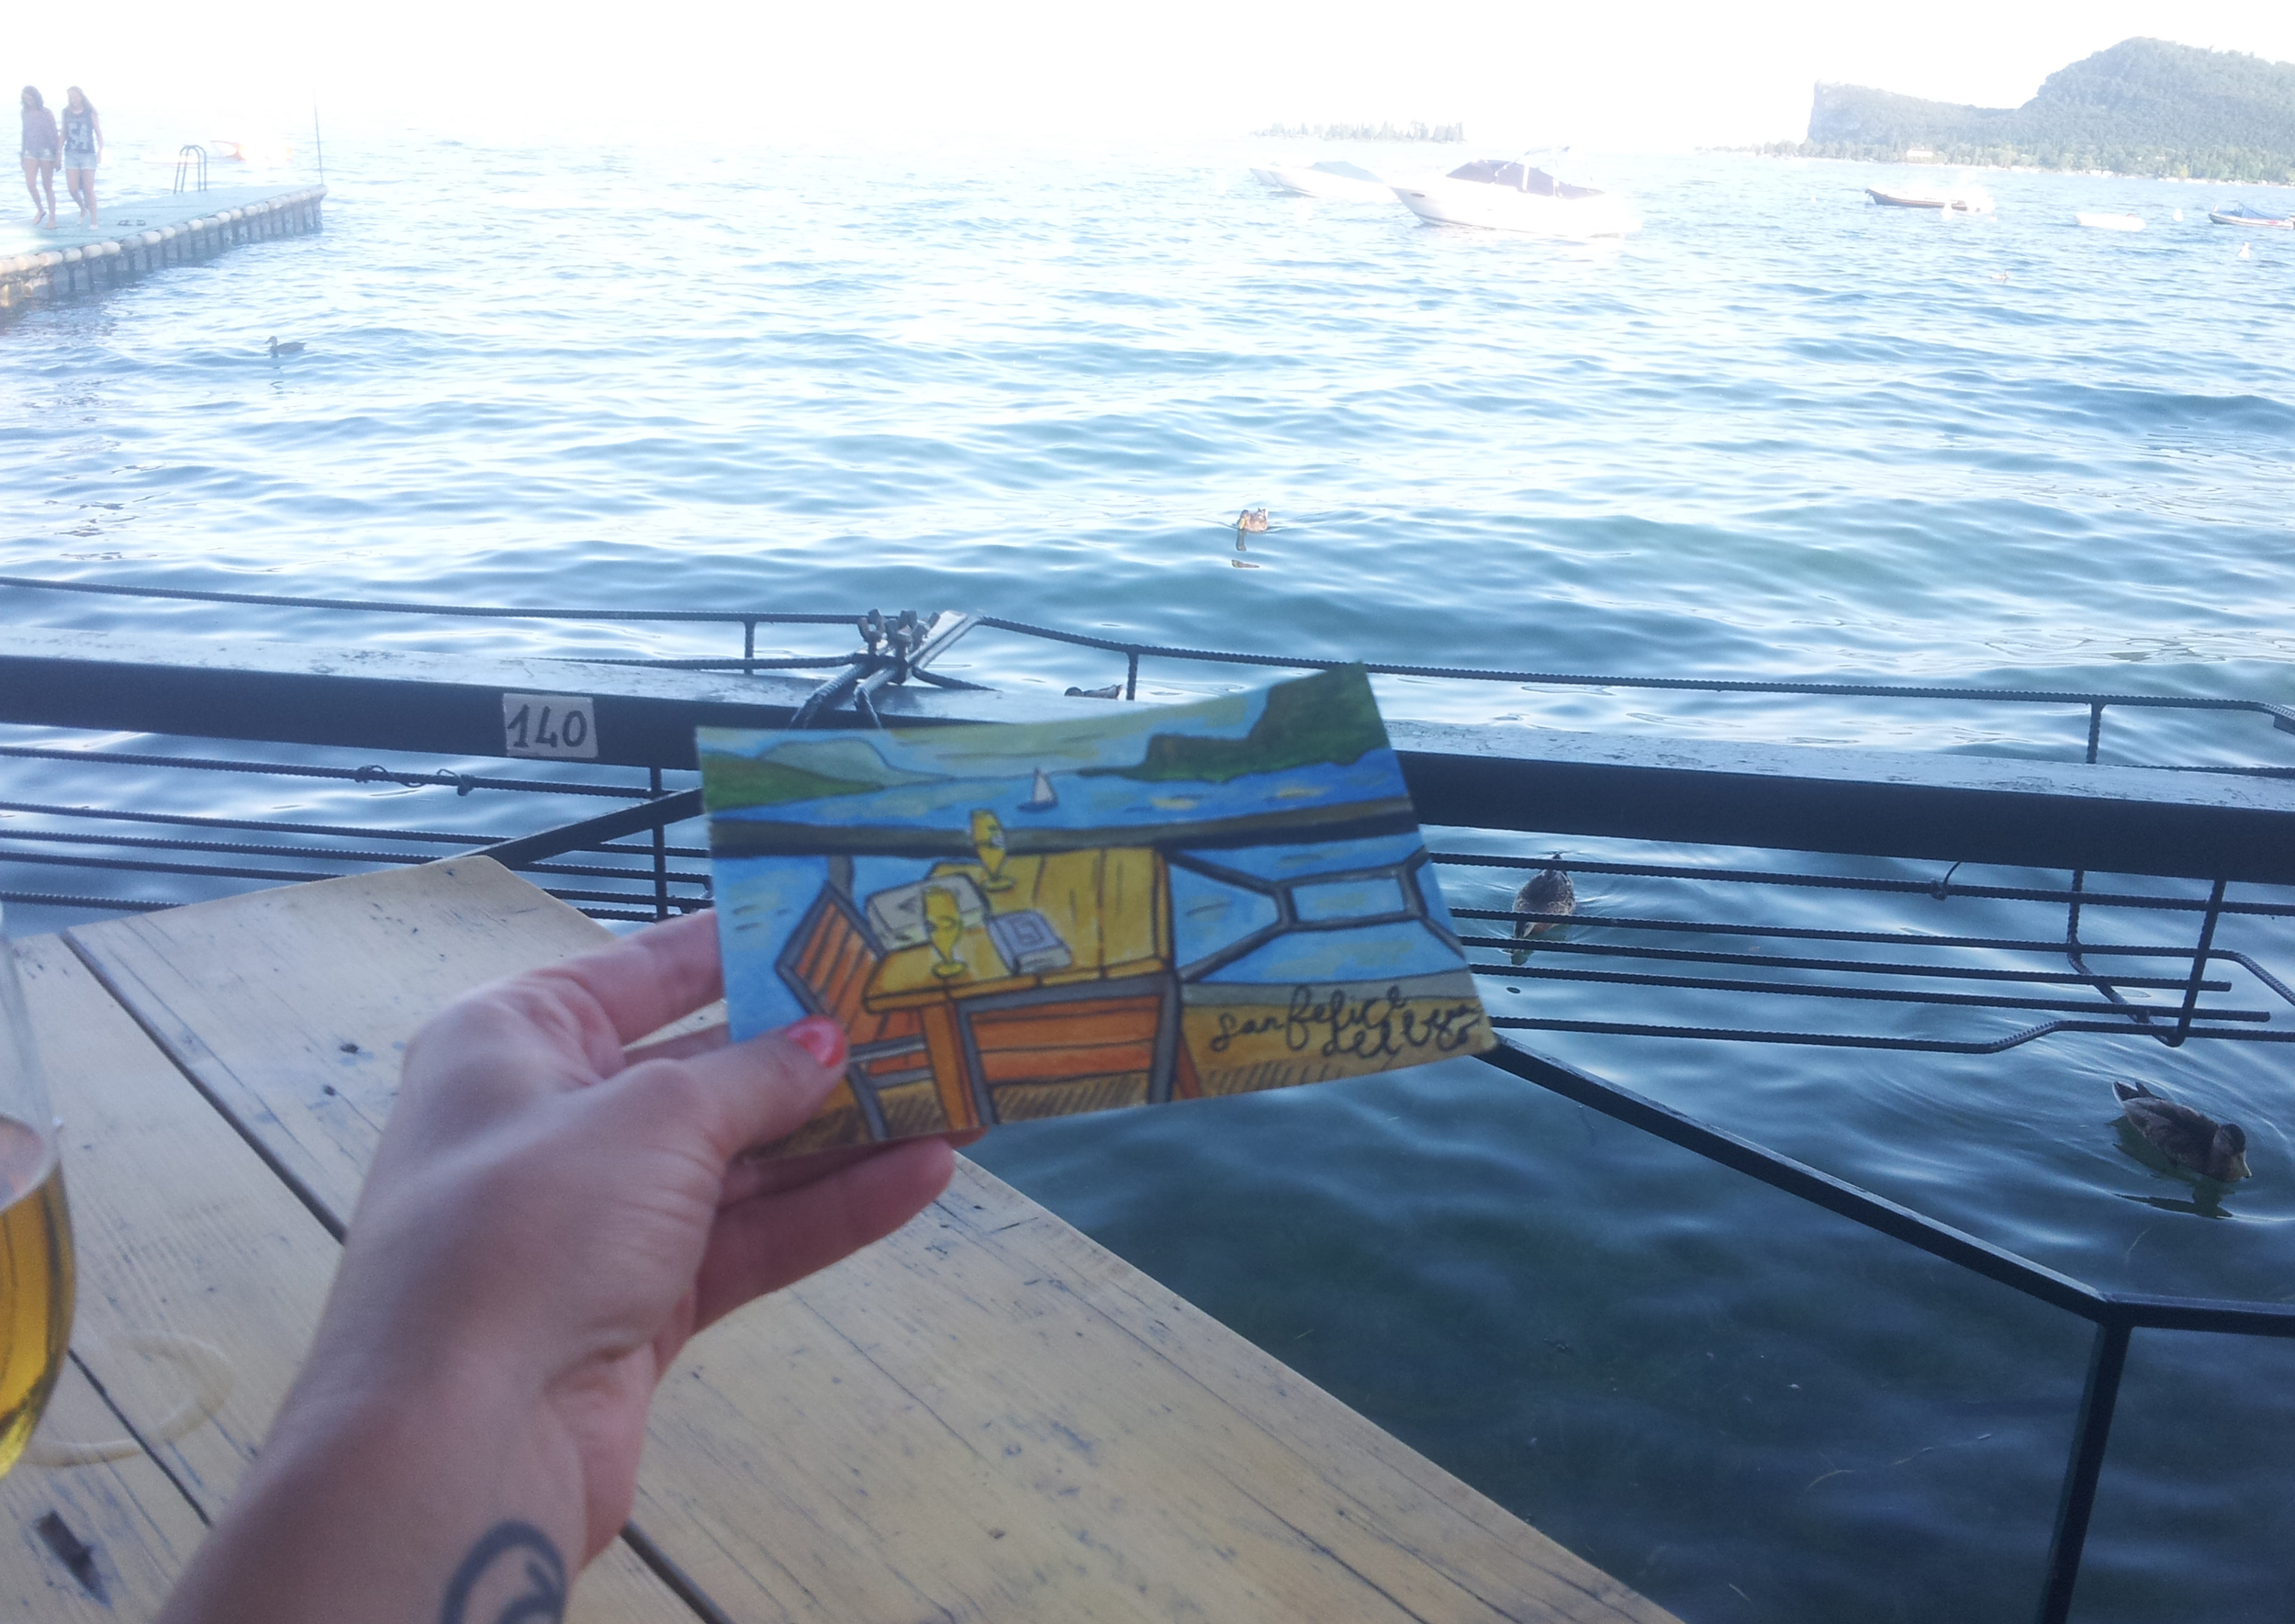
- Take your time and make sure your travel companion knows what he or she is in for! Nothing is worse than feeling rushed when you feel like drawing, so discuss this in advance. Jochem usually brings a book to read (or occasionally joins me by doing some drawing or writing of his own!), but you can also just agree to meet each other again in an hour or so. Finding a comfortable drawing spot on a terrace of a wine bar usually helps, too.
- Just pick something to draw, anything. In the picture above I'm drawing one small part of a gorgeous old Roman ruin. It had much better parts and the view of the ocean on the other side was no doubt better as well, but I picked this bit of wall because, well, there was a bench in front of it and there weren't a million tourists around taking selfies. Looking back at the postcard I drew there, I remember the whole place, not just the wall, so mission accomplished, I think.
- Write down in your journal what you did that day if you really didn't have time to draw (or just didn't feel like it). It'll help you remember - plus it'll make your trip seem that much longer.
- Be flexible. Sometimes it works out, sometimes it doesn't. And always bring along a headlamp when you go camping in a tiny dark little tent and you want to be artistic after sundown. You sexy thang!
Need More?
I made a little zine about how to keep a journal on the road. It's not huge, but it's got some good tips and fun illustrations! You can buy it here, in my Etsy shop.


Because I love paying my bills and I did not throw a tantrum like a two year old, like, at all.
Buongiorno, folks!
How is everyone? I hope you're all magnificent! We just came back from our delicious Italian adventure (gelato! pasta! pesto! gelato!) and you'll be glad to know I spent a lot of time drawing this trip.
The drive to Italy is quite long, so we decided to stop over in Annecy, France on our way there. The weather was terrible, but Annecy is a lovely little town and I definitely want to come back for a weekend and explore it further. Next day we set up camp in Tellaro, Italy, on the Gulf of Poets. Sounds so romantic right? I thought so too, until I read this story about Shelley drowning and being eaten by fish before his body was dug up from the sand and burned on the beach in a brain-fizzling fire. This detail was in our guidebook. Wtf, folks. Anyway, our campsite overlooked the Mediterranean and it in fact was quite idyllic.
Our first day in Tellaro, we spent on the 'beach' (mostly rocks) and thought about languages and they way they sound.
The Gulf of Poets is near the Cinque Terre, so we had planned to go there and do some hiking, but once we got to Lerici where we wanted to catch the boat there, the weather had turned dreadful. We turned back and drove to Genua instead. Pretty city, but a little dirty and very busy, so after visiting some palaces and having lunch, we decided to picknick in Portofino for dinner. Portofino is supposedly one of the most picturesque harbors in the world and is dominated by big yachts and tan people in white clothes and loafers. We watched the sun go down behind the multicolored houses while eating ciabatta bread with artichoke and pistache pesto. Heaven.
The sun was back on the 25th and we decided to grab the boat to the Cinque Terre and do some hiking. The Cinque Terre are five adorable little villages on the rugged Italian Riviera. The surrounding area is a Unesco-protected national park, and officially the villages are not reachable by car (although it doesn't seem like this is true any longer). You can tour the villages by boat or train, but you can also walk the journey. Or so we thought. Apparently a flash-flood took out half of the paths a couple years ago and instead of 5 hours, the new trail (which was much steeper and longer) would take almost twice as long. Because we depended on the boat to take us back home before dusk and because my knees were not loving all the steps, we did about 5 hours of the trail (3 out of 5 villages) and did the boat/train route for the rest. It was a sizzling hot day with some amazing views, rewarding mountain tops, and a glass of local wine at the end of it.
Camping just wouldn't be the same without the tent flooding, of course. During the night, our (borrowed) tent gave up the will to live and broke in the heavy rain. Everything was wet and in the morning we evacuated everything in garbage bags and fled to nearby Sarzana, where we walked around, had some coffee, enjoyed the sunshine, and eventually bought a new tent. It was a blessing in disguise, as the new tent was much bigger and so much more comfortable.
Venezia! Jochem had never been, so we had to make a stop here. The city was lovely as ever, but the camp site was terrible. Even though I had been there before and hadn't remembered the camp site as such, it was dirty and swampy and the mosquito's were killing me. I was quite miserable for a little bit, but Venice was worth it.
The camp site was so terrible that for some reason we left a day too early - by accident! We had the whole journey planned out and camp sites reserved everywhere, so our next stop actually wasn't available for the night and we decided to drive towards Verona and see what was available. We ended up staying at a farmhouse (or 'agriculturismo') called Alle Torricelle, which was just amazing. It was just the most gorgeous place, with an impressive 'certified' herb garden. All the snacks and food were home made by the matron of the house, and we were shown around the herb garden by her. Verona was also a pleasant surprise. Such a pretty place and definitely worth a visit.
The last week was spent on Lake Garda where we took three days of windsurfing classes. It was much easier than we anticipated, and so much fun. We also visited some little towns and ancient ruins while there, as the area surrounding Lake Garda is just gorgeous. I didn't do much drawing because we were out on the water all day, and I was working on some watercolor post cards (more on those later).
And then we got home. We did stop over in Strassbourg on our way back, but I didn't do any drawing then either, as I had to get back to work the morning after.
I'm happy that I got to do quite a lot of drawing on this trip. I think usually my trips are a lot shorter and I feel like I would rather spend time doing things than drawing them, but this vacation had a nice mix. I'll write another post on my travel art kit and how to work outside, but in general let me say it was great to draw 'in the moment' more than usual.
Have you been drawing on your trip? Please share, I LOVE travel journals!


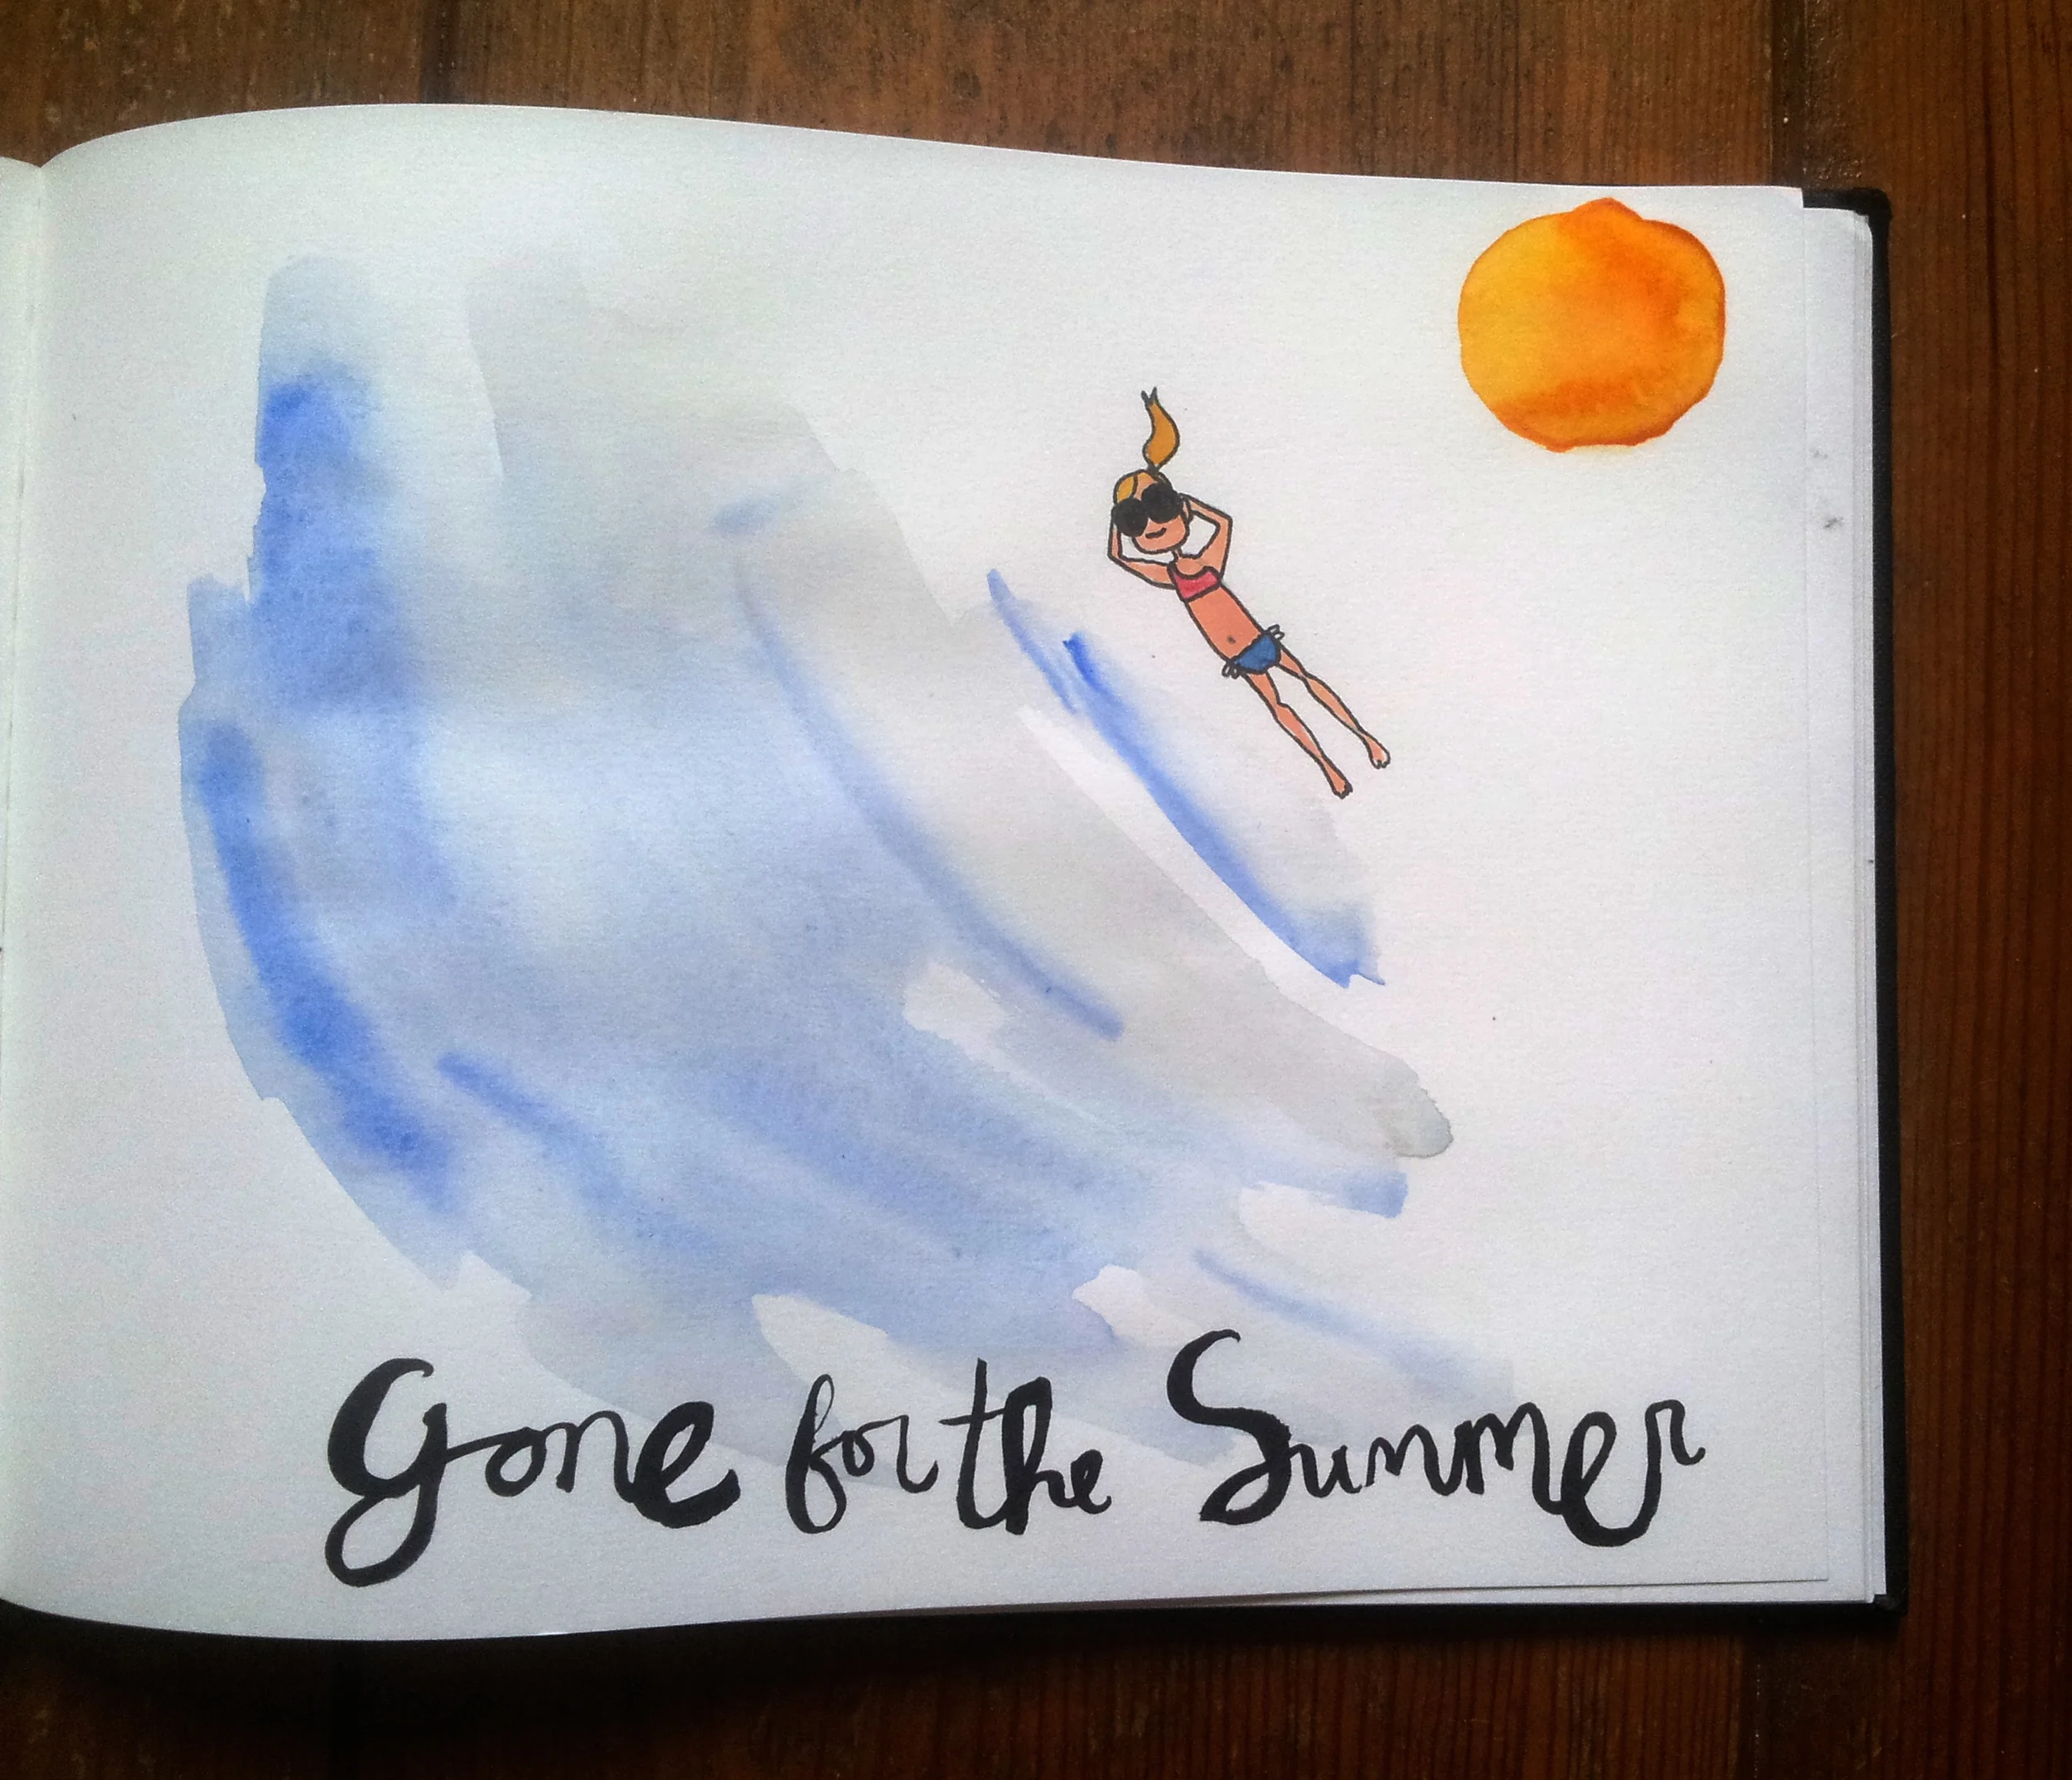
See you all in August!
Felt like bustin' out the markers this week, so here's some real color for you, folks! As always, click the images to enlarge the picture and let me know what you think in the comments below!
My first journal page made with the new dip pen (picture here, before coloring picture here). I'm reasonably happy with the result, but MAN learning new things when you're as old as I am is HARD! I feel like I'm ready to retire now.
Yes, this happened. I remember everyone else (my parents, neighbors) was much more upset about the whole thing than I was. I just thought the man was a little cray-cray.
It really was fun, in the end. Both the festival as well as the OCD party.
A lesson in letting go.
I had breakfast.
Ha, you didn't see that one coming, did ya?
We thought we were lucky this year. "We'll simply just skip winter," we thought excitedly! But yeah, so, then, now, it actually seems like we're being hit with double the amount of happily blooming plants, trees, and grasses. Joy.
I've been feeling tremendously inspired these past few weeks. Inspired to read, inspired to work, inspired to draw, inspired to... cuddle with my new kitten MISO! AAAHHH!!!
This last weekend, the Stripdagen Haarlem took place in... Haarlem, a gorgeous town not far from Amsterdam. I'll devote a separate post to some of the artists I saw, discovered, and rediscovered while browsing the many booths and exhibitions, but it was a lovely day and I'm still riding the wave of creative energy it gave me.
What inspires you? Who inspire you (right now)? I'd love to know!
Hallo hallo!
Hope you're all well. In the past few months I've received quite a few messages (well, 3, which is a lot for me) with the request to do a post on how I create my digital illustrated journal pages, so I've created a little step-by-step here. First off, a little disclaimer: I am completely self-taught and have never followed any kind of course on illustration or Photoshop, so I am sure my process is a lot more painful and laborious than need be, but it's a process I've figured out over the course of a year and that seems to work for me.
For more information on how I lay out and draw my pages, check out my other tutorials.
Tools
- Your drawing, in black ink (I use Microns)
- Scanner (I use something like this)
- Wacom tablet (I use this one)
- Photoshop (any version, we're not doing anything special here)
Step 1: Scan, Open in Photoshop & Crop
The first thing to do is to scan your lovely black and white journal page into Photoshop (or something similar, I'm just very used to Photoshop). Before you do this, you'll have to make sure to thoroughly remove all pencil marks from your page. Some people seem to use some kind of magical blue pencil when sketching that won't show up on your scanner, but I use a regular mechanical pencil and that stuff is a b•tch to remove, even in Photoshop. So! Clean up! Also - if you're using a book like I do, make sure not to draw too close to the spine as it can be hard to scan properly. You then open the file in Photoshop and crop it to the appropriate page size like so.
Step 2: Levels & Clean up
The most important step then, is to mess around with the levels and clean up the page. You want your lines to look black and crisp and not purplish and messy. You open up the Levels menu (shortcut Cmd-L or Image > Adjustments> Levels). Excuse the preview, I've got the Dutch version of Photoshop, but the image you'll see will look something like this.
There are various ways of messing around with the levels, but I like to tell Photoshop what's what, by using those little eyedropper tools on the right. Use the white one all the way on the left to tell Photoshop that that yellowy background color is supposed to be white, and the black one on the left for the black line work. For me, this is usually enough to get some nice clear lines.
Then, clean up the image - which, by now, should be looking a lot easier. I love shortcuts, so I use the magic wand, select everything that's supposed to be white and use the selection tool to grab any bits that were left out. Delete (Cmd-X) and behold the whiteness.
Step 3: Layers & Coloring
While you're there, go ahead and make another layer with just the line work on it. Pick Select > Inverse from the menu, copy (Cmd-C), cut (Cmd-X) paste (Cmd-V) and voilà - you've got a clean background, and a layer with just the lines on it. This will come in handy when you're working with separate backgrounds (I'll show you later).
This is usually also the place where I start to think of coloring for my page. I've written more about how to pick your colors in this post, and my process is pretty much the same, but digital - which means you have an endless choice of colors. I like to pick three basic ones and drop a few swatches in a corner for easy use. I'll start by using these colors, adding them to some larger parts of the drawing with the bucket tool on the left (using the eyedropper tool on the left to sample the colors).
This is also where the various layers come in handy already - for example, the sky behind the little row of houses is on the background layer, while the colors of the houses in the foreground are on my first layer. It's much easier that way, and it prevents you from accidentally erasing any lines.
Step 4: Work it!
Looks good already you think? Nah, not really. Up close, the drawing's still a mess. Which means we've come to the most laborious part of the process. Just to remind you: there's probably an easier, faster way of doing this but I just haven't found it yet. To be honest, though, I quite like this bit and the attention it requires. It has the same meditative feel to it as coloring in pages by hand.
What you're going to do, is grab that little brush tool, and color in every white bit by hand, and clean up the lines a little more. Also, I like to add shadows to my drawings, so I'll usually pick one color darker than the color I've already added, and manually add them to the mix. Highlights may be useful sometimes as well.
This will take forever, so you better start liking the process, or find a quicker, less labor-intensive way of going about this. In any case: good luck! Here's a close up of
Step 5: Finish Up & Save
Six hours later, your drawing may look something like this (well, hopefully not, because I'd have to sue you for copyright infringement). Time to add some finishing touches! To make the page look more polished, go into the background layer, and add a little "drop shadow" to the panels. I know, I know, Photoshop has a function for this, but I like the uneven look of doing it by hand. Call me a masochist. I've also added a background behind the date here.
Then you remove your little color-swatch in the corner (or you can keep it), and save for... web, print, whatever. For web, you'll mostly only need a file with a 70 DPI, for print always go with 300 DPI at least.
Tadaa! You're done!
I hope you enjoyed this tutorial and please let me know should you have any questions at all! Also - if you're a more advanced Photoshop guru and have got some tips on how I could improve this process, remember, sharing is caring! So please do so in the comments below.
Thanks all! Enjoy your week!
Oh hai. What's up? Cool, cool. Me? Oh, well, it looks like I've got manflu, so I'm not sure I'll make it. Thanks for reading my last words, in case these are indeed them. You see, I was in Berlin last week, and my boss was there too, and he had the manflu, and then I got sick. I may actually be on the mend (and in London!), but probably not. It's probably lethal, as most cases of manflu are.
Anyhow. I had this whole fun weekend planned with dates, parties, and dinners, but alas. Every time I try to be Little Miss Social, I either get some kind of semi-terminal illness, or all of my two friends are busy (or don't pick up their phones, probably because they don't recognize my phone number). This weekend it was the former, though, so we took it easy. Bed, park, bed. Bed, garden, bed. We picked up a few plants from my dad and stepmom's garden (Mr. Floor did the digging, I did the pointing) and relocated them to our garden. The fern in particular is very special to me, as it's been in the family for as long as I can remember, was specifically mentioned as an exception in both the deed when my parents sold their house, as well as in the notary agreement when they got divorced. Pretty funny stuff, as far as divorces go.
I usually don't really have any issues with calling myself an 'artist' or 'illustrator'. It even says so on this site, doesn't it? And it's on my Twitter profile! Yet, when I was surrounded by about 20 "real" illustrators, I didn't really know what to answer. Funny how that works.
Click image to enlarge.
Every childhood has a trauma, and this one ranks pretty high on my list.
Basically, I was telling Mr. Floor about this sweater last week and because he was of course fascinated by the thrilling and dramatic story behind it, I decided to draw it for you. Yay for you. Enjoy.
© Anna Denise Floor